
MegaBlocks USS Enterprise!!
This is one creation we just finished and I wanted to share it with everyone here.... it isn't a Lego, but Rob and I emailed each other about this one quite a bit before my son and I decided to give a chance. And, it turned out awesome! I've put some detailed instructions at the end, so please feel free to follow and or comment.
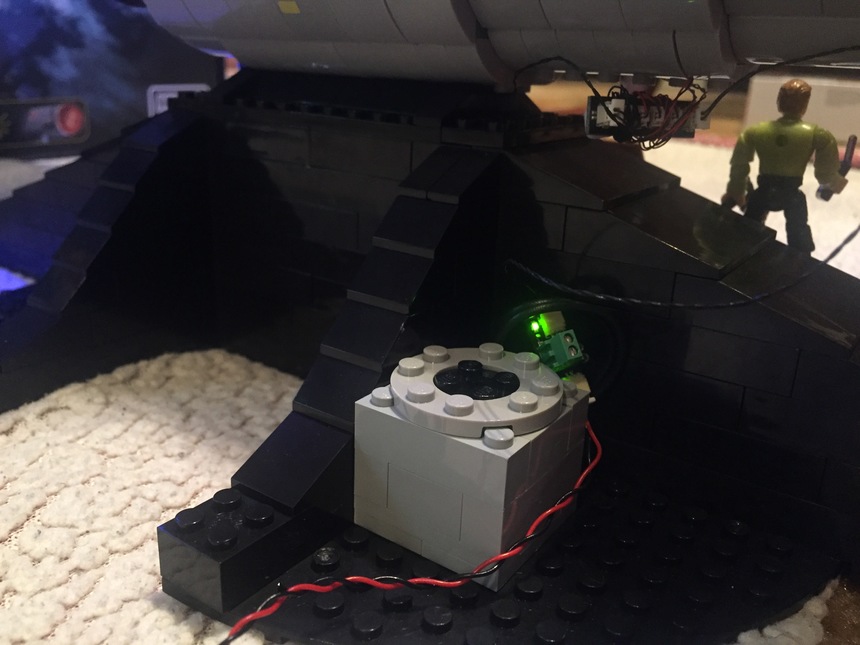
The first couple of pictures of of various parts of the build process:


The last two photos were actually taken too early, as you need to leave a LOT more slack at the bottom of the spine section. Also, PLEASE take GREAT care when you are inserting the spine into the hull as it is VERY easy to destroy the 24" lead wire that you have in the spine (hint: I destroyed two of mine during the build process!).
This is a pretty time-consuming build to start with, and adding the lights makes it even longer. HOWEVER, I would STRONGLY recommend adding the lights during the initial build process. MegaBlocks tend to fit a lot tighter than Lego blocks, so you would almost have to disassemble the entire model in order to add all the lights.
All that being said the final build is amazing! I'm a life-long Star Trek fan, and building this with my little boy has made him have much more of an interest in the franchise as well. Take a look at the completed model:


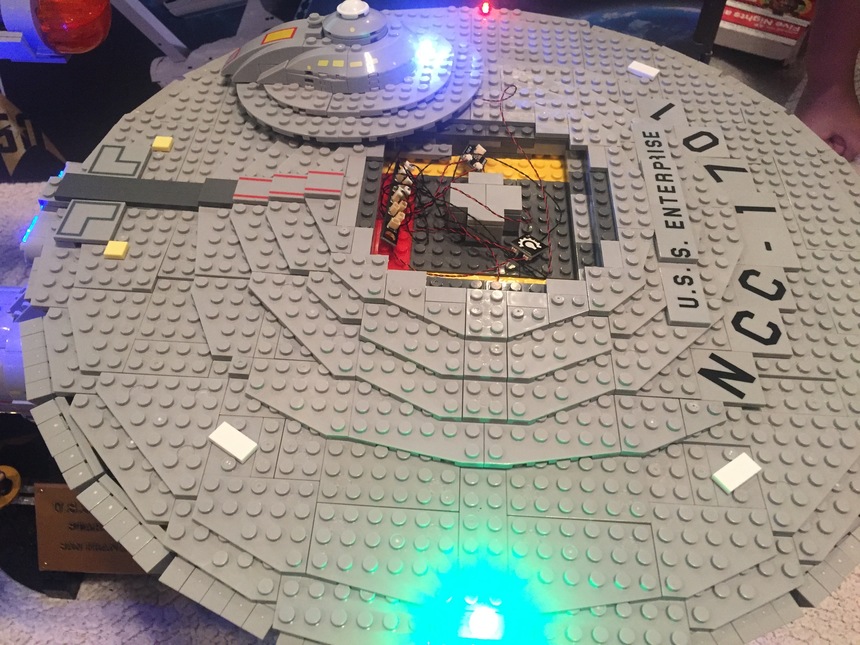
As you can see, it came out better than I had expected it would. I use the USB adapter for all of my light projects and the Lego power button as well (all available from Rob!). The one BIG note about the construction process is the saucer section where the spine is inserted. Due to the very small tolerance for space that Mega Blocks leaves for larger models like this, you essentially have to assemble the top section of the saucer AROUND and OVER the spine insert! Once you add all of the wires for the lights, it creates JUST enough expansion space that the saucer will not fit properly on the spine. So, just keep that in mind if you choose to build this one.
Despite all of the time and effort, this one is an absolute must-have for most of us. And, the lights will make it that much better when you add it to your collection!
Feel free to leave questions and/or comments.... parts and instructions coming next!
Thanks again Rob for brining new life to our Lego collection!!
Enterprise (parts required-- added direct product links to Brickstuff website 4-19-17):
- 1x2 expansion board (small ports) — 1 (Included with 2-packs of Pico LEDs)
- 1x4 expansion board — 2 (BRANCH15 2-Pack)
- 1x8 expansion board (large ports) - 1 (BRANCH11)
- two-channel lighting effect controller - 2 (TRUNK01)
- blue pico LED — 6 (3x 2-Packs-- Blue Color)
- flashing white pico — 1 (1x 2-Pack-- Flashing White Color)
- 6-inch cable — 3 (1x 4-Pack)
- 12-inch cable — 1 (1x 4-Pack)
- 24-inch cable — 1 (1x 4-Pack)
- 1x1 transparent clear round brick — 3
- 1x1 transparent red round brick - 1
- 1x2 transparent blue plates - 2
- cool white pico — 4 (2x 2-Packs-- Cool White Color)
- green pico - 1 (1x 2-Pack-- Green Color)
Total estimated cost for the lighting parts is approximately $168, not including power supply. We recommend either our USB Cable or 3AA Battery Pack.
Enterprise (instructions):
- step 39 — lay in two blue LED and leave enough extra for mounting behind the primary deflector dish (use 1x4 expansion board); also place 12-inch cable outside below for power input
- step 61 — run one white flashing LED over shuttle bay entrance (use clear transparent 1x1 brick to mount)
- step 75 — attach the two blue LEDs on the brown portion behind where the main deflector will mount (use two clear studs from Lego to keep in place)
- step 84 — lay in 24” extension cable along the spine to connect saucer with main hull section
- step 91 — plug in extension cable from saucer section to 1x4 expansion board before attaching the spine
- (page 66 - step 2) — lay in one cool white LED along center for under saucer primary lighting)
- (page 66 - step 3) — lay in two white LED lights (one starboard and one port) for under saucer running lights) (attach to mini lighting effect controller on each side)
- (page 85 - step 41) — use 2-port expansion (small ports) board to attach below-saucer running light before mid-deck plating is put into place; also use 8-port expansion board (large ports) to attach two lighting controllers (use two 6-inch cables for this), 1.5-inch cable for 2-port expansion (used for dorsal and ventral saucer lighting); use 6-inch cable to attach new 4-port expansion for 4 blue light (impulse drive lights; attach green light on starboard side for upper saucer light and one additional cool white for upper port light (use red 1x1 transparent clear brick for cover)
- (page 89 — step 48) — run two blue LED lights (impulse drive) (aft on saucer), two flashing white LED light (starboard and port) for saucer upper running lights, and white LED light for primary forward display light
- (page 93 — step 56) — affix two flashing LEDs to upper body of saucer (use transparent Lego studs to hold in place)
- (page 99 — step 67) affix two flashing LEDs to under body of saucer (use transparent Lego studs to hold in place)
- (page 100 - step 68) — run lighting for under saucer primary lighting display through primary sensor array build and affix to bottom (need transparent stud cover to hold in place)
- (page 105 - step 90) — affix primary display light before bridge is put into place (use transparent Lego stud to hold in place)
- (page 107 - step 92) — use two blue LED lights for impulse drive; replace the black pieces with 1x2 transparent blue Lego plates
4 replies
-
Wow John! You did a fantastic job-- the end result does look stunning. And that you for posting the detailed assembly photos and instructions-- this will be VERY helpful for any others who buy the same set and want to achieve the same results. I know this was a lot of work to document, so thank you again!
-
Thanks Rob! I wouldn't have even been able to have attempted it without your help. I hope that everyone likes and finds it helpful to them as well!
-
Nice detailed instructions. Makes me want to light some of my space models.
-
Any thoughts on this project?? I am no where near done as far as the viewscreen goes, but I have played a little bit with lights shining through the bricks...

