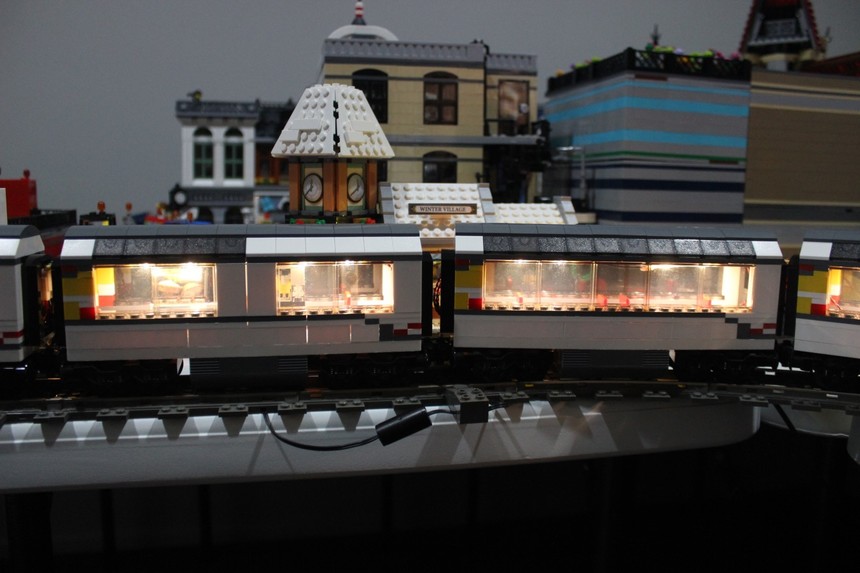
Lighting the Northern Explorer
Ever since recreating KiwiRail's Northern Explorer in brick form, I wanted to light up the interior and give it tail lights as well, to match the locomotive (generally) hauling the train.
The plan was to put the power supply in the viewing car to be prototypical with the real thing, and pass power through the train with removable connectors so the train could be separated (unlike an earlier project where the train is now permanently coupled). After a bit of research I settled on a Powerboost 1000 Charger from Adafruit to power the system, coupled with a 1200mAh battery (the largest that would fit). This also gives the option of USB charging so the battery doesn't need to be removed.
Here's a few photos of the train in action (along with a Brickstuff holiday lamp on the station platform):

The cafe car and a standard passenger car sitting at the Winter Village station

Complete with tail lights on the luggage van at the end of the train as well!

The train sitting on the embankment above the park and log siding

Passing the other way down the hill towards the mall station (the embankment hole is still being built, awaiting parts)

Now here's some photos of how it all works. Here's the main power supply, the viewing car (the real van also houses a generator). This is also fitted with tail lights so both ends of the train has them.

Taking the roof off reveals the internal wiring and power supply.
 The heart of the system, an Adafruit Powerboost 1000 Charger, connected to a 1200mAh LiPo battery. This has a Brickstuff DIY cable soldered to it for output power, and a USB connector on the other end to recharge the battery (lights can also still run while charging).

Taking the doorway off the locomotive end reveals the battery hiding under the floor - it's barely visible when running around the layout.
 This is the current solution for getting power between carriages. Using a 4 pin connector allows for three lighting channels through the train, meaning I can have directional headlights and tail lights as well with other trains if I choose to. (The two unused channels are just passed through on the carriages and left disconnected on the viewing car.)
I'm not fully satisfied with this solution though as the plugs are quite large, and get stuck in the doorways on S curves. The wires also have a tendency to pull off, so I may look at getting Brickstuff's 4-pin connectors instead.

That's all for today, there'll be more trains wired up in a similar way over time so I'll certainly be back :)
9 replies
-
What a great setup! Thank you for sharing, especially the detail about how you wired everything up and powered it. I know a lot of customers ask about using LiPo and other types of power sources to power their trains-- your setup is a great case study of what's possible!
-
Thanks Rob! What I forgot to add though though was the video, which features yet another Brickstuff-based creation - a railway signal :)
-
Alex Burgess Awesome! Love the ditch lights and the signal. Is that our signal or did you make the control yourself?
-
Rob Klingberg at this stage the signal is manually controlled, what you can't see in the video is the breadboard with a switch and mess of wires to bodge it together for this one shot :)
The ultimate goal is to get a PFx brick to control multiple signals (using Ethernet cabling for longer distances) and tying it to train automation using The Brick Automation Project.
-
Alex Burgess Wow you're definitely thinking ahead. We actually have some prototype automatic train signal controllers if you'd be interested. They use a small IR reflector sensor in the track.
-
Rob Klingberg that would be awesome! I need to pick up a few other bits and bobs in the store anyway (i.e. convert both this and my 60051 passenger train to use Brickstuff's 4-pin connectors between carriages), so may as well ship it all at once :)
Looks like you're low on DIY cables too? I need quite a few with 3 channels in several carriages :P
-
Alex Burgess No worries on the DIY cables-- we've got plenty. I just put another 20 packs into stock. Let me know if you need anything else that's not showing up in the store. Thank you!
-
Cheers Rob, now just to wait for payday next week so I can buy a bunch of stuff :) will let you know once I place the order.
-
Rob Klingberg Have placed an order for some bits and bobs (order #226866791), if you want to include the prototype in the same package :)
